在国内主机上通过 Google Cloud CLI 以及 gsutil 工具获取 GCP 存储桶数据
本文原来拟定的标题为:《墙,墙,又是墙!》,以显示我的愤怒。
故事背景是由于 Google Workspace 放弃了白嫖用户,我转付费了其中若干套,放弃了若干套。放弃的订阅可以导出全部数据到 GCP 存储桶。
大概是这样的:
在 gsutil 工具主页上看到安装方式的文档链接,文档首选通过自定义 repo 的方式安装:
sudo tee -a /etc/yum.repos.d/google-cloud-sdk.repo << EOM

[google-cloud-cli]

name=Google Cloud CLI

baseurl=https://packages.cloud.google.com/yum/repos/cloud-sdk-el8-x86_64

enabled=1

gpgcheck=1

repo_gpgcheck=0

gpgkey=https://packages.cloud.google.com/yum/doc/yum-key.gpg

       https://packages.cloud.google.com/yum/doc/rpm-package-key.gpg

EOM
sudo dnf install google-cloud-cli
经测试,由于众所周知的原因,这个方案在国内主机上是行不通的。
知天朝者,Google 也。他们还提供了通过归档包的方式进行安装的方案。目前可以下载到的最新的版本归档是:google-cloud-sdk-377.0.0-linux-x86_64.tar.gz。
这里要感谢仁慈的 TG,没有赶尽杀绝,留了 dl.google.com 活口:
# wget -c https://dl.google.com/dl/cloudsdk/channels/rapid/downloads/google-cloud-sdk-377.0.0-linux-x86_64.tar.gz

# tar xzf google-cloud-sdk-377.0.0-linux-x86_64.tar.gz

# cd google-cloud-sdk

# ./install.sh
安装完成后提示:
To update your SDK installation to the latest version [381.0.0], run:

  $ gcloud components update
作为精神强迫症患者,必须来一波:
# gcloud components update
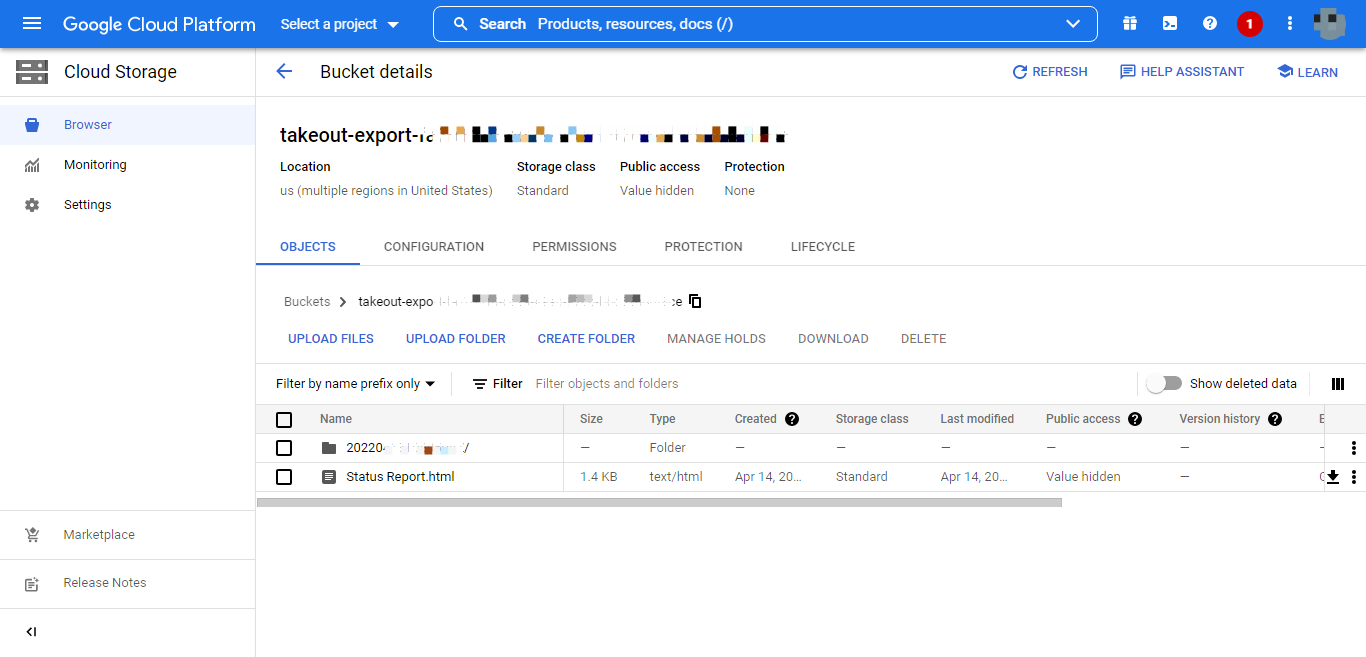
到这里身心还较为愉悦,尝试列出 GCP 存储桶的文件:
# gsutil ls gs://takeout-export-xxxx
我就猜到会报错:
ServiceException: 401 Anonymous caller does not have storage.objects.list access to the Google Cloud Storage bucket.
网上大致有以下 3 种方案:
1、说“要先 gcloud init”
由于墙的存在,是 init 不起来的。
2、说“gcloud auth login” 或者“gcloud auth application-default login”
这些操作会提示:
You are authorizing gcloud CLI without access to a web browser. Please run the following command on a machine with a web browser and copy its output back here. Make sure the installed gcloud version is 372.0.0 or newer.


gcloud auth login --remote-bootstrap="https://accounts.google.com/o/oauth2/auth?xxxx"


Enter the output of the above command:
由于当前终端不带浏览器,也不合适。
3、说“gcloud init --skip-diagnostics”
相当于执行了第 2 个方案,不合适。
正确的姿势是:
# gcloud config set pass_credentials_to_gsutil false
看到“Updated property [core/pass_credentials_to_gsutil].”的提示后,执行:
# gsutil config
This command will create a boto config file at /root/.boto containing
your credentials, based on your responses to the following questions.
Please navigate your browser to the following URL:
https://accounts.google.com/o/oauth2/auth?xxxx
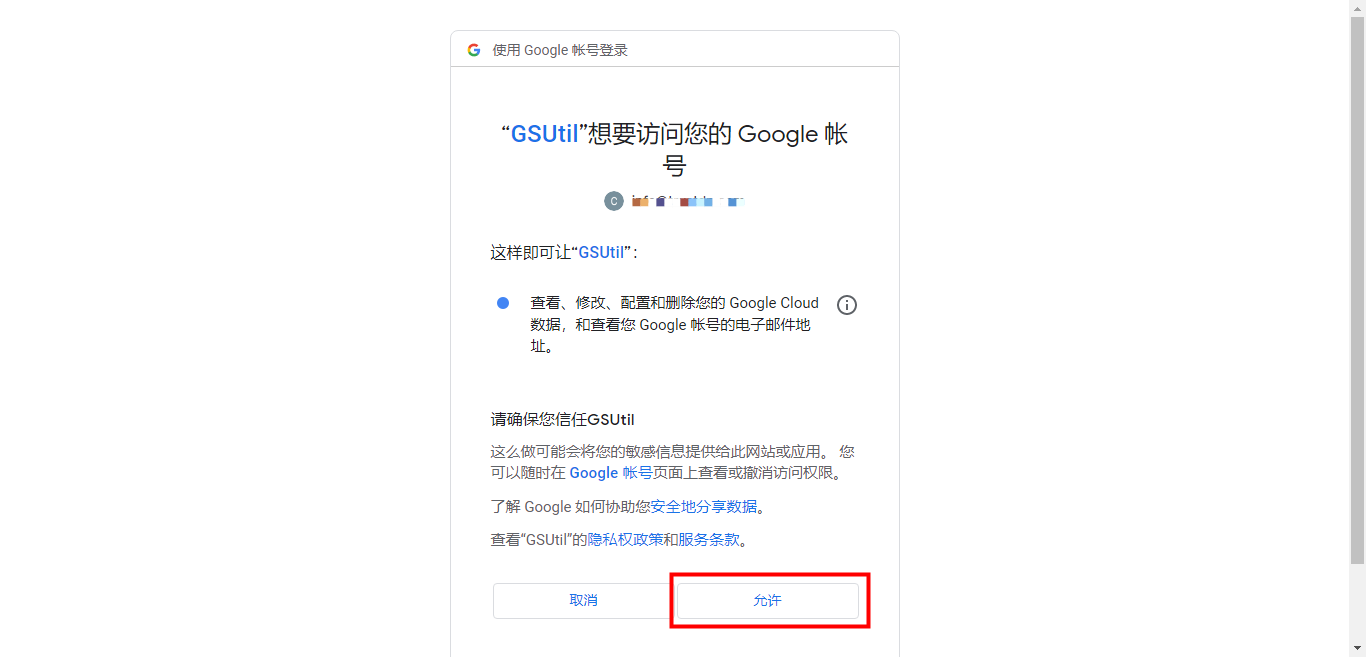
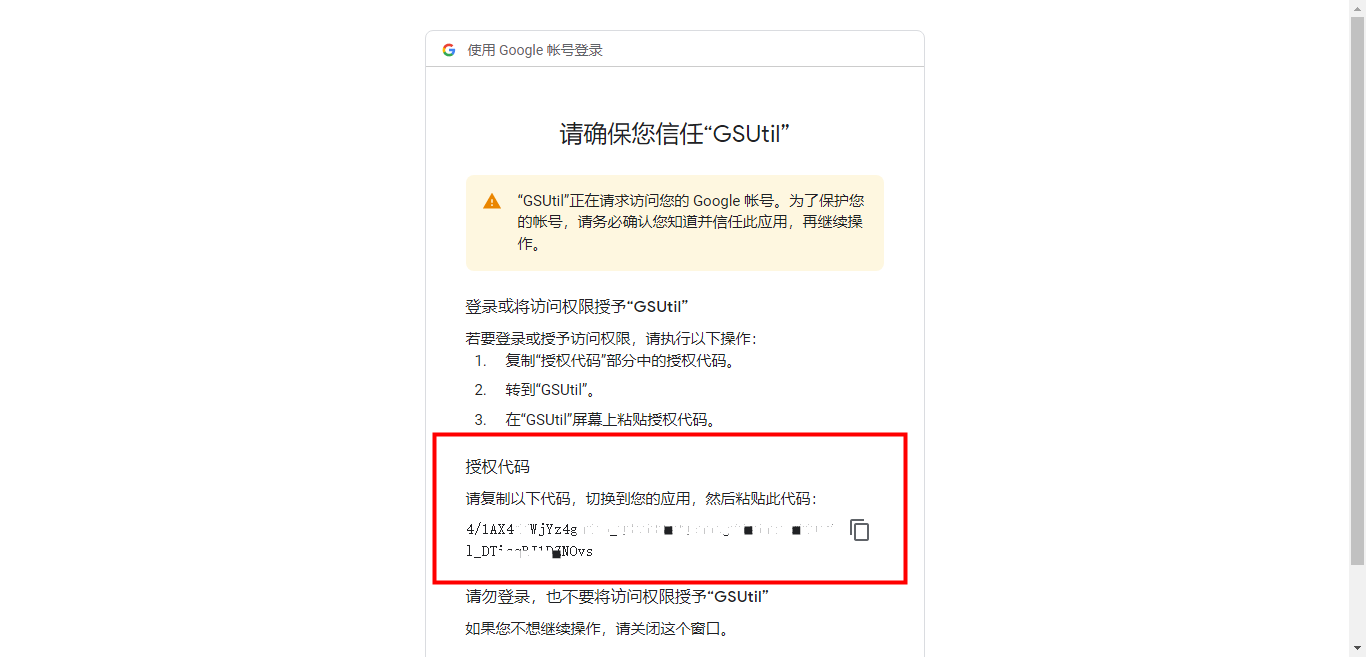
In your browser you should see a page that requests you to authorize access to Google Cloud Platform APIs and Services on your behalf. After you approve, an authorization code will be displayed.
Enter the authorization code:
嗯,这才是我要的。回到浏览器,打开那个 URL,根据提示完成授权:
将获取到的授权代码贴回到终端中:
等啊等,等来了报错。然后问是否需要通过代理来连接(到底还是 Google 想的周到),这里我开启自行搭建的境外 SSR,填入:
Unable to connect to accounts.google.com during OAuth2 flow. This can

happen if your site uses a proxy. If you are using gsutil through a

proxy, please enter the proxy's information; otherwise leave the

following fields blank.

What is your proxy host? xxx.xxx.xxx.xxx

What is your proxy type (socks4, socks5, http)? socks5

What is your proxy port? xxx

What is your proxy user (leave blank if not used)?

What is your proxy pass (leave blank if not used)? xxx

Should DNS lookups be resolved by your proxy? (Y if your site disallows client DNS lookups; NOT supported for socks)?
又是等啊等,结果连接失败。此时我想到了另一个救命稻草:Clash。
这里以适配 CentOS 7 操作系统的 Clash 版本为例进行下载、安装与启动:
# wget -c https://github.com/Dreamacro/clash/releases/download/v1.10.0/clash-linux-amd64-v1.10.0.gz

# gunzip clash-linux-amd64-v1.10.0.gz

# mv clash-linux-amd64-v1.10.0 clash

# chmod +x clash

# ./clash
经过漫长的等待后,出现:
INFO[0000] Can't find config, create a initial config file

INFO[0000] Can't find MMDB, start download

INFO[0124] Mixed(http+socks) proxy listening at: 127.0.0.1:7890
看到最后一行说明 Clash 已启动,就可以中断运行了。
接着用自己机场的配置文件替换 ~/.config/clash/config.yaml 文件。
我的配置文件是这样的:
port: 7890

socks-port: 7891

redir-port: 7892

mixed-port: 7893

allow-lan: false

mode: Rule

log-level: info

ipv6: false

...
然后根据配置文件中的端口号启用全局代理(后续已证明不需要这步):
# export ALL_PROXY=socks5://127.0.0.1:7891
以后台方式重新启动 Clash:
# ./clash &
确认一下是否已平安出国:
# curl ip.gs

INFO[0130] [TCP] 127.0.0.1:45344 --> 147.xx.xx.xx:80 match Match() using Final[香港 01]

212.xx.xx.xx
好,继续执行 gsutil config,发现依然连接超时。此时尝试使用 http 代理:
# gsutil config

Backing up existing config file "/root/.boto" to "/root/.boto.bak"...

This command will create a boto config file at /root/.boto containing

your credentials, based on your responses to the following questions.

Please navigate your browser to the following URL:

https://accounts.google.com/o/oauth2/auth?xxxx

In your browser you should see a page that requests you to authorize access to Google Cloud Platform APIs and Services on your behalf. After you approve, an authorization code will be displayed.


Enter the authorization code: xxxx

Unable to connect to accounts.google.com during OAuth2 flow. This can

happen if your site uses a proxy. If you are using gsutil through a

proxy, please enter the proxy's information; otherwise leave the

following fields blank.

What is your proxy host? 127.0.0.1

What is your proxy type (socks4, socks5, http)? http

What is your proxy port? 7893

What is your proxy user (leave blank if not used)?

What is your proxy pass (leave blank if not used)?

Should DNS lookups be resolved by your proxy? (Y if your site disallows client DNS lookups; NOT supported for socks)?

Please navigate your browser to the following URL:

https://accounts.google.com/o/oauth2/auth?xxxx

In your browser you should see a page that requests you to authorize access to Google Cloud Platform APIs and Services on your behalf. After you approve, an authorization code will be displayed.


Enter the authorization code: xxxx

INFO[0340] [TCP] 127.0.0.1:37826 --> oauth2.googleapis.com:443 match DomainSuffix(googleapis.com) using .. Google[香港 01]
看到最后一行,我不禁老泪纵横。
终于可以上主菜了:
# gsutil -m cp -r \

>   "gs://takeout-export-xxxx" \

>   "gs://takeout-export-xxxx" \

>   .

INFO[0704] [TCP] 127.0.0.1:37830 --> oauth2.googleapis.com:443 match DomainSuffix(googleapis.com) using .. Google[香港 01]

INFO[0704] [TCP] 127.0.0.1:37834 --> storage.googleapis.com:443 match DomainSuffix(googleapis.com) using .. Google[香港 01]

Copying gs://takeout-export-xxxx...

Copying gs://takeout-export-xxxx...

INFO[0705] [TCP] 127.0.0.1:37840 --> storage.googleapis.com:443 match DomainSuffix(googleapis.com) using .. Google[香港 01]

INFO[0706] [TCP] 127.0.0.1:37842 --> storage.googleapis.com:443 match DomainSuffix(googleapis.com) using .. Google[香港 01]

- [x/x files][ xx.xx MiB/ xx.xx MiB] 100% Done

Operation completed over x objects/xx.xx MiB.
完事儿。如果需要切换 Google 账号,从另一个桶里扒拉吃的,可以在删除这两个文件后继续:
# rm -f /root/.boto /root/.boto.bak

# gsutil config
这时会提示超时,貌似需要重蹈覆辙一次刚才的代理配置。
其实,贴心的 Google 已经写了文档,可以为整个 Google Cloud CLI 启用代理:
# gcloud config set proxy/type http

Updated property [proxy/type].

# gcloud config set proxy/address 127.0.0.1

Updated property [proxy/address].

# gcloud config set proxy/port 7893

Updated property [proxy/port].
此时再执行 gsutil config 会得到令人极度愉悦的提示:
Enter the authorization code: xxxx

INFO[7465] [TCP] 127.0.0.1:37868 --> oauth2.googleapis.com:443 match DomainSuffix(googleapis.com) using .. Google[香港 01]
好了,让我们重新整理一遍可用方案的思路:
1、下载安装 Google Cloud SDK
2、下载安装 Clash,完成配置、启动
3、为整个 Google Cloud CLI 启用代理
4、
# gcloud config set pass_credentials_to_gsutil false

# gsutil config
5、
# gsutil -m cp -r \

  "gs://takeout-export-xxxx" \

  "gs://takeout-export-xxxx" \

  .
最后,我 TMD 想说:Fuck you GFW!
请问被冻结的QQ,有什么办法可以找回吗
换个问题。
真的太感谢博主详细的教程 ,终于可以批量下载了(T-T)
太好了,是大佬我们有救了,为了从这个该死的google下载我论文复现需要的数据,我折腾了好久,csdn找了好久,问了ai好多遍,终于是让我看到了大佬的教程!
请问这样的话,下载数据的流量是从代理走吗
四年前我采用全局代理的方式肯定是走代理的。我认为即便出站模式不是“全局”而是“规则”,大概率也会命中“GFW List”,那就是走代理的。建议跑起来后监听一下。